Ceroli Crisis is a type of event where you will team up with 3 players to defeat 5 different bosses. In Ceroli Crisis you have 5 different difficulties: Easy, Normal, Hard, Nightmare and Hell. Teaming up can be done with invite links in chat or with random match up.
Now the Ceroli Crisis event is not so hard but is more about commanders and your technology, VIP, etc. You can learn all skills from bosses but you will not have enough damage.
My advice is to avoid matchmaking. A lot of people do not know what to do or they are just bad. Some people simply do not care.
Try to get players from your kingdom that know how to play, have good commanders and skills.
There are 5 bosses in the Ceroli Crisis Event. Every boss is different. Skills are not hard to learn. When you learn how to defeat bosses in the Ceroli Crisis, you will see how easy it is.
Dekar
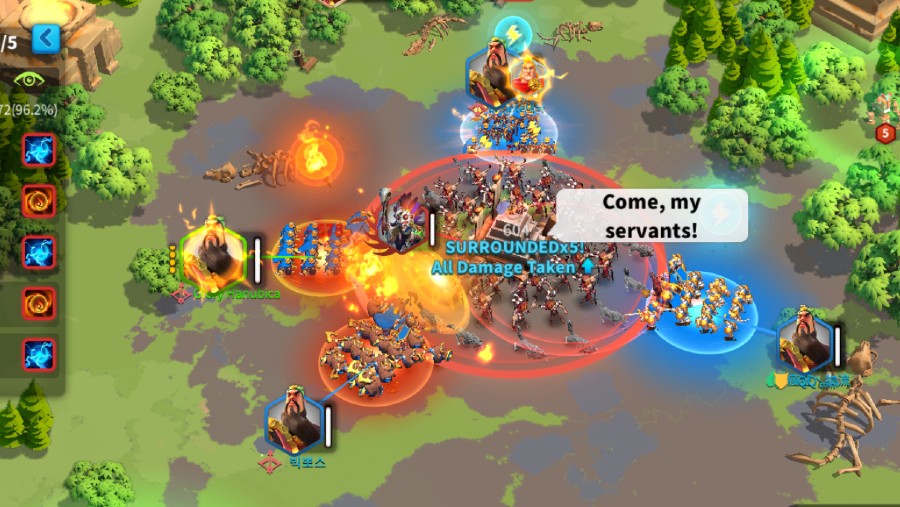
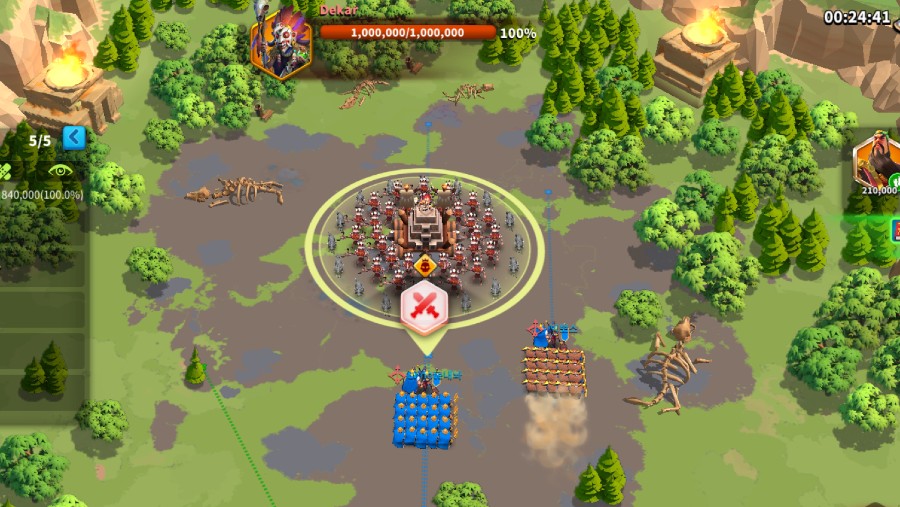
Dekar is a new boss in Rise of Kingdoms Ceroli Crisis that you can defeat to earn rewards. When comparing Dekar to other bosses from the Ceroli Crisis, you’ll notice how difficult he is and how many mechanics he has.
When you go up against Dekar, you will be up against a boss who uses a lot of skills and poison damage that you must avoid. Now, based on our testing, we concluded that the average player using random matchmaking will not be able to easily destroy Dekar. You may be wondering why, and the answer is that he has a lot of mechanics and skills that you should avoid, and we all know how lazy players are when it comes to learning skills from bosses. Other bosses are simple to manipulate, even if you have no idea what you’re doing.
As a result, we recommend that you find players in your kingdom who are willing to spend a few extra minutes reading, planning, and using the right commander to defeat a boss. Even if you plan carefully, there is no guarantee that you will be successful.
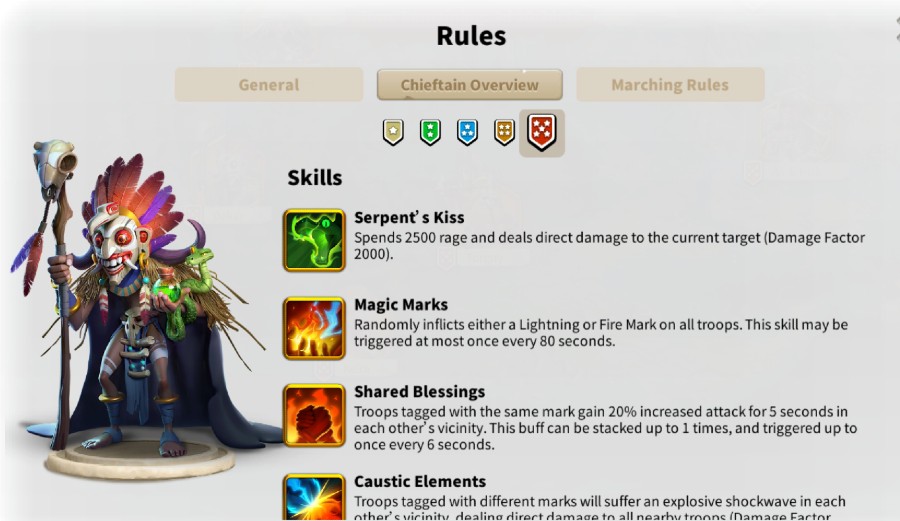
Dekar Skills
Serpent’ s Kiss– Spends 2500 rage and deals direct damage to the current target (Damage Factor 2000).
Magic Marks- Randomly inflicts either a Lightning or Fire Mark on all troops. This skill may be triggered at most once every 80 seconds.
Shared Blessings- Troops tagged with the same mark gain 20% increased attack for 5 seconds in each other’ s vicinity. This buff can be stacked up to 1 times, and triggered up to once every 6 seconds.
Caustic Elements– Troops tagged with different marks will suffer an explosive shockwave in each other’ s vicinity, dealing direct damage to all nearby troops (Damage Factor 2000). This effect can be triggered once every 6 seconds.
Nature’ s Course– Dekar switches marks between two randomly selected troops at certain intervals.
Corrupting Poison- Dekar summons 2 sentries from the center of the battlefield after an expanding warning zone is indicated. The zone will explode when all sentries have been slain or upon reaching maximum size, dealing damage to all troops within (Damage Factor = 25000 X (number of sentries +l)).
Cursed Earth- Inflicts direct damage (Damage Factor 15000) per second on all troops within the target area for 3 seconds after designating the area with a warning zone. This area relocates 3 times.
Eldritch Gaze– Deals different types of delayed area damage to a fixed, target location (Damage Factor 25000). Inflicts 4 instances of damage.
Corrupting Influence– After being in battle for 600 seconds, all damage dealt is increased by 10000%.
Strategy against Dekar
Now, the strategy will be changed because the boss is still relatively new and requires a lot of testing, but for the time being, the best strategy to defeat the boss is:
First, standard teams will be established. It will have three DPS, one tank, and one healer. You will be given abilities to heal yourself as well as abilities to deal instant damage. When you enter the raid, you’ll attack the boss from all sides and wait for him to use a skill called Magic Marks.
The fire and lightning icon above your commander will help you identify magic marks. Not all players will now receive the same magical marks. Two players can get fire and three players can get lightning. When you get this buff, you must now group up with another player who has the same buff. It increases your damage with the shared blessing skill and prevents you from taking damage from the caustics elements skill. You will lose your attack buff and take unnecessary damage from caustics elements if you do not group up with another player who has the same mark.
It is important to understand that lightning and fire marks can be swapped at any time by nature, so if this occurs, you must change positions and run to the player with the correct mark.
Dekar now has three additional skills that can deal massive amounts of damage. You must avoid it at all costs or you will suffer exorbitant damage. You’ll notice that Dekar will use them by looking for red indicators on the map. It’s difficult to explain how to avoid them. You must test it yourself to understand how they work and how to avoid them.
Keira
For Keira, you will use one tank and three DPS troops. It’s a relatively simple boss. You have to tank with Richard or any other tank commander while 3 other DPS commanders will do damage.
Tank commanders– Richard + Alexander
Dps commanders– Khan +YSG, Minamoto + Cao Cao but Khan and YSG are better because of nukes and AOE. You can use any Rise of Kingdoms commander pair with a high amount of nuking power.
Keira will spawn a lot of smaller troops. With AOE you can damage Keira and smaller troops at the same time.
Avoid slow– red circles that will blow after some time. It can be on your teammates or on you. If you do not avoid slow you will not be able to get in safety while arrows are falling down especially when the shield dome is far away.
Shield dome- you must get in the shield dome while arrows are falling down. If you do not get under the shield dome you will receive insane damage. But if you use Richard and infantry you need to predict if you can get under the shield dome in time.
If you can get under the Shield dome in time just stay in place and let Richard heal. This is because infantry units and commanders are very slow, and you do not want to waste time.
Frida
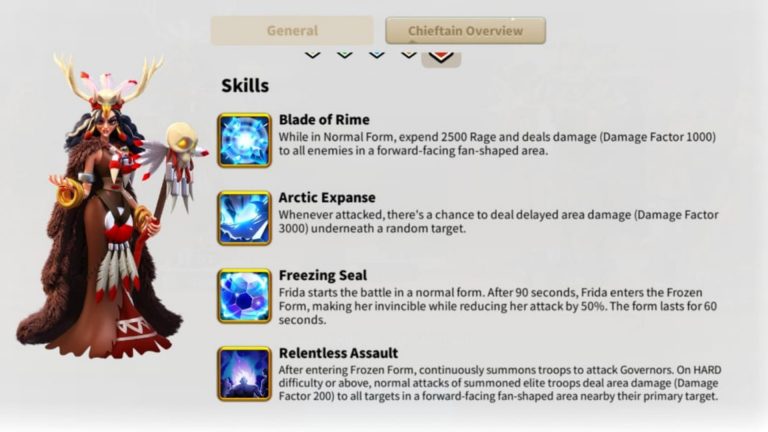
Frida is an easy boss to defeat. She has 3 most important skills that you must avoid and know. Skills are Blade of Rime, Freezing Seal, Thawing Point.
Commanders that are good against Frida are:
Richard + Alexander or Richard + YSG
If you do not have them use something tanky with AOE like Sun Tzu.
When you enter a raid you must position your troops. Move your troop to 4 different sides and hit. Don’t run away from anything except when the boss goes frozen.
If you are trying to move you will lose time and DPS. You do not want that. When the boss goes frozen, move all your troops away from the boss as far as possible and hit the small spawns.
After that Frida will use the big AOE Thawing Point skill. When Thawing Point is used, go back and attack Frida.
Do not worry about spawn; they will not do that much damage. Repeat the steps above. My biggest advice for this is to use strong AOE commanders.
Skills
Blade of Rime- skill will do a good amount of damage. That is why you do not want to stack troops. Just position them in 4 different directions. West, South, East, and North. With that positioning of troops, you will be able to DPS all the time without the need to avoid skills.
Freezing Seal- When Frida activates Freezing Seal just go to the end of the map. You need to spread out every player at each end of the map. There, small units will spawn that you have to kill. The smaller units are easy to kill but they are doing AOE damage. That is why stacking up players at the same spot is not a great idea.
Thawing Point- THIS IS VERY IMPORTANT SKILL TO AVOID. When Frida leaves Frozen form she will do a big AOE damage multiple times. Avoid this skill or you will lose half of your troops.
Astrid
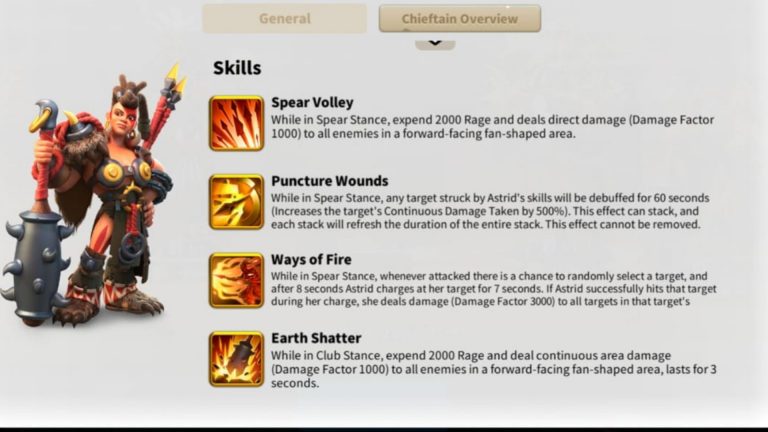
Astrid is a boss that can kill you all very fast if you are not careful.
It is not so hard to kill Astrid but just be careful. Arrow over your commander’s head and debuffs can end your raid very fast if you do not avoid them.
Spear Volley- Only one player should take damage from it. Do not stay close to each other or you will all get debuff where you receive 500 extra damage.
Ways of Fire- If you are targeted with this skill just run for your life. Do not let Astrid attack you or you will add 3 stacks of negative effects to all players and also you will receive a good amount of damage.
Earth Shatter- When you see that Astrid changed stances to this skill you have to be careful or you will die in 10 seconds. You will recognize this skill when you see a red club over her head.
Now you can stay and tank it if you do not have negative buffs from Astrida. If you have, you have to run or you will die.
If you have more than 3 debuffs on the right side of your screen just leave the fight till that buff disappears then attack here again.
Commanders that are good against Astrid are
Tank Guan+Alexander and for DPS commanders with huge nukes like Khan, Minamoto, or Cao Cao. In short, use the best damage commanders that you have.
Ak and Hok
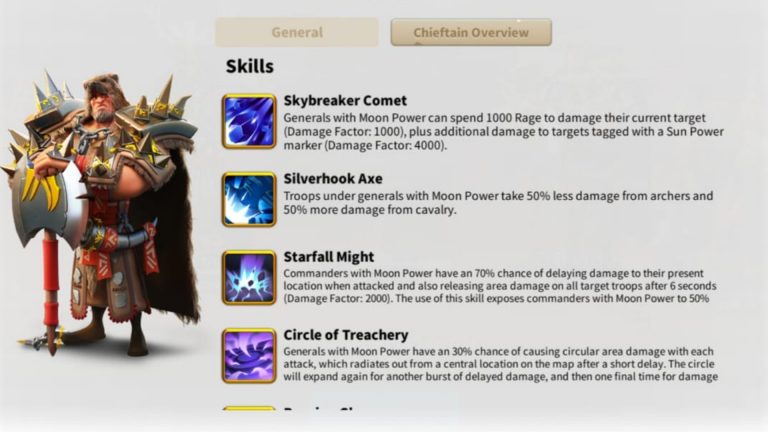
They are the hardest bosses to kill because people do not know what to do and how to kill it but when they learn it is relatively easy.
For these bosses, you need 2 tanks and 2 DPS and one healer. Tank 1 will taunt Ak and tank 2 will taunt Hok. When Ak and Hok swap skills your tanks must swap bosses and taunt them. So Now tank 1 will taunt Hok and tank 2 will taunt Ak.
An important thing to know is that you must separate them at the start of the raid. If Ak and Hok are too close to each other you will receive damage and debuffs from both.
Another mechanic of this raid is that you have to avoid circles. If you see a smaller circle you must get out of it. If you see a big circle just go to the middle.
If you see that there is a random unit spawned you have to kill it.
Use the best commanders that you have but keep in mind that boss under moon power will take 50% less damage from archers and 50% more from cavalry. So use cavalry troops and commander for a boss under moon power
Boss under Sun power will take 50% less damage from cavalry and 50% more from archers. So for a boss under Sun power use archer units and commanders.
Torgny
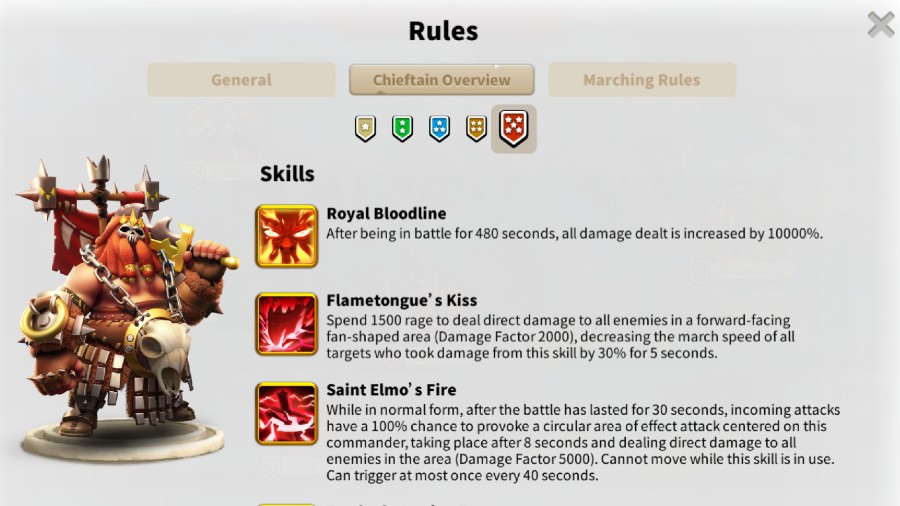
Torgny is one of the Ceroli Crisis’s bosses. We can say that he is one of the most difficult bosses to defeat because he utilizes many mechanics that you must be aware of. No exploit will allow you to finish this boss faster. As a result, you must understand what each skill does and how to play against it.
To begin, it is recommended to have 3 DPS, one tank, and one healer on your team. Most players should have a skill that deals instant damage to their intended target.
Each player on each side will attack Torgny normally. Torgny will use a skill after a while, and you will notice a large red arrow above you or your teammate’s commander. That indicates that a small Lohar will spawn on top of that arrow, and you must attack and destroy it as soon as possible.
When you destroy a small Lohar, it creates a shield that you can enter to protect yourself from damage. If you do not destroy a small lohar that is spawned, you will not receive a shield and will take an insane amount of damage.
That is why we recommend using the instant damage ability so that you can use it on a small lohar as soon as he spawns and gain a protection shield.
There is also one skill that can deal a lot of damage, which is indicated by the large red circle around the boss. If you stand inside it, you will be severely injured. Simply step out of it and after explodes you can attack the boss again.
What to buy in Ceroli Shop?
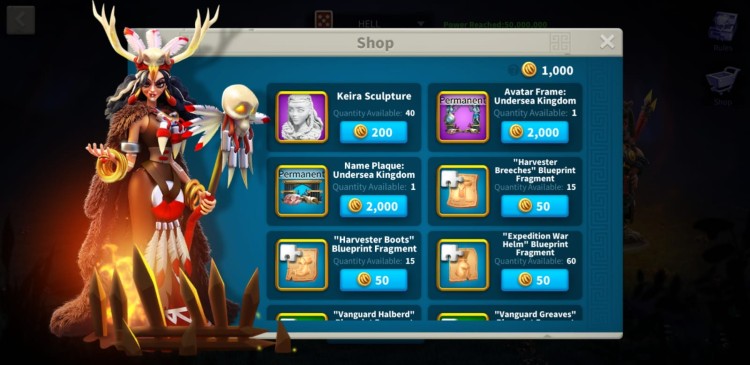
There are a lot of good things that you can buy in Ceroli Shop but first, you must buy new commander Keria because you will need it for upcoming events. I would advise you to avoid buying potions If you are not planning to go for the best time in ROK If you have Keira on the max level then my advice is to get War Helm blueprints, great for the cavalry units. Or simply buy what you like and need.
Ceroli Crisis Skills
There are 3 roles that you can choose and they are a tank, support, and DPS. Each role has different skills that you can choose and additional role features like all damage received -10%. What type of role and skills you will pick depends on what commander pair you will use but make sure that you are using best rok commanders.
Tank Role
Role Features
- All Damage dealt -30%
- All Damage received -10%
- Enmity Down +20% (higher chance to keep boss and spawns taunted.)
Primary Skill
- Taunt Taunt target, forcing it to attack your troops for 3 seconds; Its Enmity value towards the last target will be transferred to you. (Cooldown: 10 seconds) . This skill is great for tanks, especially for fighting Ak and Hok.
Second Skill
- Suppressing Roar Reduce the damage dealt by all nearby enemies by 15% for 30 seconds. (Cooldown: 20 seconds)
- Shatter Armor Reduce the target’ s defense by 20% for 30 seconds, and draw a large amount of their Enmity. Stacks up to 3 times. (Cooldown: 20 seconds)
- Divine Healing Immediately restore 50% of your troop strength and remove all debuffs from your troops. (Cooldown: 300 seconds)
Generic Skills
- Emergency Healing Immediately heal your troops and restore 5% of their troop strength. (Cooldown: 35 seconds)
- Deadly Strike Deal skill damage to the current target once (Damage Factor 2500). (Cooldown: 20 seconds)
- Group Shackles Shackle all nearby enemy troops, rendering them immobile for 10 seconds. (Cooldown: 60 seconds)
DPS Role
Role Features
- All Damage Dealt +20%
- All Damage Received +30%
- Enmity Drawn -20%
Primary Skill
- Reckless Attack Increases all damage dealt by 30% and all damage received by 10% for 20 seconds. (Cooldown: 180 seconds)
Secondary Skills
- Controlled Rage Speed of Rage Gained for all your troops is increased by 50% for 20 seconds. (Cooldown: 120 seconds)
- Meteor Strike Deal skill damage to the current target once (Damage Factor 4000) (Cooldown: 20 seconds)
- Savage Attack Over 10 seconds, all normal attacks will increase damage taken by the target by 1% for 5 seconds. Stacks up to 25 times. (Cooldown: 25 seconds)
Generic Skills
- Emergency Healing Immediately heal your troops and restore 5% of their troop strength. (Cooldown: 35 seconds)
- Deadly Strike Deal skill damage to the current target once (Damage Factor 2500). (Cooldown: 20 seconds)
- Group Shackles Shackle all nearby enemy troops, rendering them immobile for 10 seconds. (Cooldown: 60 seconds)
Support Role
Role Features
- Normal Attack Damage -50%
- Counterattack Damage -50%
- 50% of skill damage dealt is converted to healing upon the allied troop (can be your own) with the lowest percentage of troop strength remaining.
Primary Skill
- Healing Light Heal nearby allied troops (Healing Factor 15000). (Cooldown: 180 seconds)
- Blood Drinker Increase all allied troops’ damage by 30% for 30 seconds. Troops can only receive this buff once every 5 minutes. (Cooldown: 300 seconds)
- Purification Immediately remove all debuffs from any nearby allied troops. (Cooldown: 15 seconds)
Primary Skill
- Dazzling Land Create a Dazzling Land area on the battlefield which lasts for 10 seconds. Allies can enter the Dazzling Land to recover 1% Of their troop strength per second. (Cooldown: 300 seconds)
- Healing Technique Target troop immediately recovers 10% of troop strength. (Cooldown: 20 seconds)
Generic Skills
- Emergency Healing Immediately heal your troops and restore 5% of their troop strength. (Cooldown: 35 seconds)
- Deadly Strike Deal skill damage to the current target once (Damage Factor 2500), (Cooldown: 20 seconds)
- Group Shackles Shackle all nearby enemy troops, rendering them immobile for 10 seconds. (Cooldown: 60 seconds)